Linux 选型与安装
根据市场份额选型,国内市场选用 CentOS,国际市场选用 Ubuntu。本文以 VMWare 环境为例,分别总结了 CentOS 和 Ubuntu 的安装和关键配置操作。
作者:王克锋
出处:https://kefeng.wang/2016/09/26/linux-installation/
版权:自由转载-非商用-非衍生-保持署名,转载请标明作者和出处。
1 企业级 Linux 服务器选型
1.1 WEB 服务器市场份额
https://www.zhihu.com/question/21421588
1.1.1 大类份额
https://w3techs.com/technologies/overview/operating_system/all
Windows 33%, Unix 44%,Linux 23%;
1.1.2 Linux 内部份额
https://w3techs.com/technologies/details/os-linux/all/all
Ubuntu 35%, Debian 32%, CentOS 21%, RHEL 4%, Fedora 1%
1.2 Linux发行版
查看命令: cat /etc/issue
https://www.teakki.com/p/57dbd0990bbe095b163a3917
1.2.1 基于 Debian
Debian, Ubuntu, Chromium OS, Google Chrome OS
包管理工具 apt-get(deb包,也可用 dpkg 命令),
也支持 tar 包源码形式安装(configure, make, make install)
1.2.2 基于 Red Hat
RHEL, Fedora, CentOS, Oracle Linux
包管理工具 yum(rpm包,也可用 rpm 命令)
也支持 tar 包源码形式安装(configure, make, make install)
1.2.3 其他
SUSE
包管理工具,也 RedHat 相同
1.3 Linux 选型
世界份额: Ubuntu > Debian > CentOS
国内份额: CentOS > Debian > Ubuntu
https://zh.wikipedia.org/wiki/CentOS
所以,迎合国内公司(包括阿里巴巴)环境可选 CentOS,
迎合未来发展趋势可试用 Ubuntu。
2 虚拟机 VMWare 安装
2.1 下载
http://www.vmware.com/cn/products/workstation/workstation-evaluation.html
https://download3.vmware.com/software/wkst/file/VMware-workstation-full-12.5.1-4542065.exe
2.2 安装
序列号: 5A02H-AU243-TZJ49-GTC7K-3C61N
2.3 一键启停虚拟机
手工操作:点击 VMWare 图标,启动 VMWare;选择所需的虚拟机;点击启动按钮;切换为后台模式;
一键开机:创建快捷方式“CentOS 开机”,指向 "C:\Program Files (x86)\VMware\VMware Workstation\vmrun.exe" start "F:\VmWare\CentOS 64 位\CentOS 64 位.vmx" nogui
如果希望 Windows 启动后自动启动,则要把该快捷方式复制到启动项里。
一键关机:创建快捷方式“CentOS 关机”,指向 "C:\Program Files (x86)\VMware\VMware Workstation\vmrun.exe" stop "F:\VmWare\CentOS 64 位\CentOS 64 位.vmx"
VMRun 更多帮助:http://up.2cto.com/2012/0810/20120810031846130.pdf
3. CentOS 安装
3.1 下载
https://www.centos.org/download/
http://mirrors.aliyun.com/centos/7/isos/x86_64/
- Minimal ISO / BT 下载: 基本版(680M), 包含 Server/预装少量软件, 不包含 Desktop;
- DVD ISO / BT 下载: 标准版(4G), 包含 Server/Desktop/预装常用软件;
- Everything ISO / BT 下载: 完整版(8G), 包含 Server/Desktop/预装更多软件。
这里选用 Minimal ISO。
3.2 安装(耗时 10 分钟)
3.2.1 安装语言
选择 “中文 / 简体中文(中国)”
3.2.2 安装位置
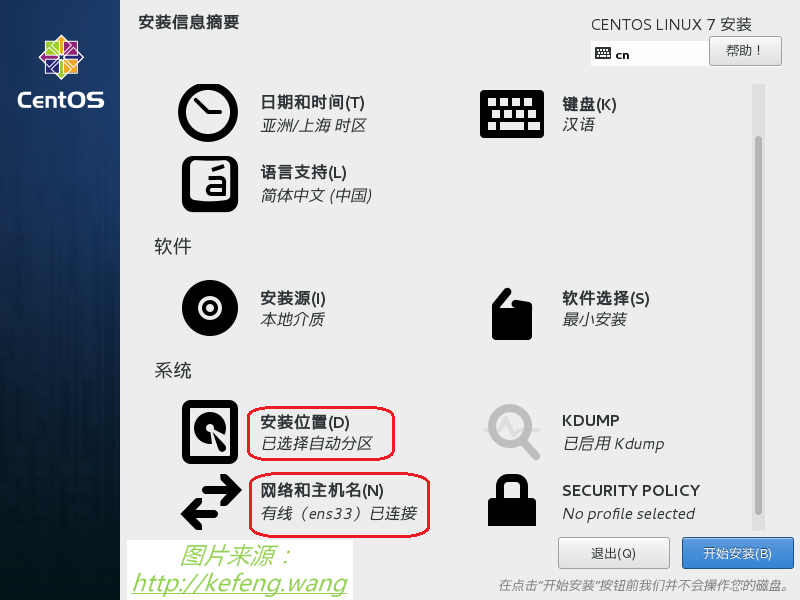
点击进入界面后,保持原样(自动分区),直接确定。
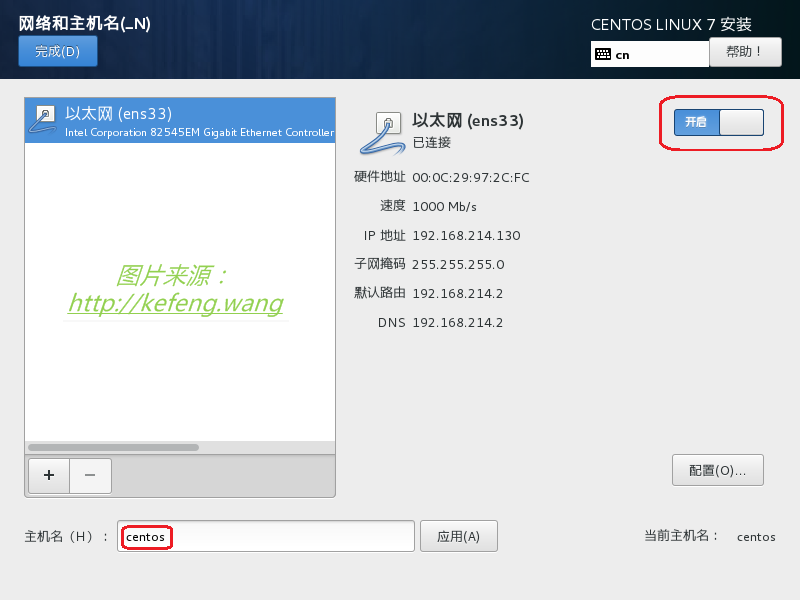
3.2.3 网络和主机名
- 修改主机名改为 “centos”(原为 localhost.localdomain),并点击“应用”;
- 重要!默认以太网状态为“已断开”,必须切换状态至“已连接”,可以看到自动获取的 IP 地址(192.168.214.132);
- 注意网络设备名为 ens33, 而不是 eth0。

3.2.4 用户配置
- 设置 root 密码,设置的密码简单时需要两次“确定”
- 创建用户 admin,设置的密码简单时需要两次“确定”
3.2.5 安装完毕后点击重启
至此,sshd 也已就绪,可供 SecureCRT 登录。
可创建快捷方式,实现一键登录主机:X:\Software\SecureCRT\SecureCRT.exe /s centos64_192.168.214.132_admin
3.3 安装后无法上网
如果安装后无法上网(局域网和互联网都不通),可能是网络没有开启:1
2
3## vi /etc/sysconfig/network-scripts/ifcfg-ens33
## service network restart
ONBOOT=yes
3.4 SecureCRT 会话选项
- 仿真:终端=”Linux”, “ANSI颜色”=on【重要】, “使用颜色方案”=on, 回滚缓冲区=32000
- 外观:当前颜色方案=”Windows”, 标准字体=”新宋体 11pt”, 字符编码=”UTF-8”
- X/Y/Zmodem:上传、下载=”X:\Software\Download”
Linux 重装后,SecureCRT 使用原有会话可能会报错:1
2
3
4### 对话框“新建主机密钥”
The host matched several entries in the host key database,
but the server host key did not match any of the entries.
### “只授受一次”按钮可用,“接受并保存”按钮不可用
此时可以在“全局选项”/“SSH主机密钥”中,删除相关主机密钥,再试。
3.5 修改 sudoers(root身份)
1 | ## vi /etc/sudoers ## vim 尚未安装不能使用 |
3.6 用户设置(admin身份)
1 | ## sudo vim /etc/profile ## 影响所有用户 |
3.7 配置 yum,放宽重试与超时
1 | ## sudo vi /etc/yum.conf |
3.8 安装vim
1 | sudo yum -y install vim* |
查看可用颜色方案: ls -l /usr/share/vim/vim74/colors/*.vim
vim 中启用颜色方案: :colorscheme desert(vim 编辑器状态中)
文件中永久配置颜色方案:1
2
3
4
5
6
7## sudo vi /etc/vimrc ## 影响所有用户
## vi ~/.vimrc ## 影响当前用户
syntax on
set tabstop=4
set shiftwidth=4
set background=light
colorscheme desert
3.9 停用 postfix(邮件服务)
postfix 用来代替 sendmail 作为邮件服务器,占用端口25。如果不需要,可以停用:1
2sudo systemctl stop postfix
sudo systemctl disable postfix
3.10 修改时区、开启ntp
1 | date -R ## 查看时区(Wed, 04 Jan 2017 09:03:01 +0800) |
3.11 安装 iptables
CentOS 7 默认使用的 firewall 作为防火墙,这里改为 iptables1
2
3
4
5
6
7cat /etc/redhat-release # CentOS Linux release 7.4.1708
sudo systemctl stop firewalld # 停止 firewall
sudo systemctl disable firewalld # 禁止 firewall 开机启动
sudo yum -y install iptables-services
sudo systemctl enable iptables
sudo systemctl start iptables
3.12 关闭 SELinux 模式
1 | # sudo vim /etc/selinux/config |
Linux sudo reboot 之后生效。
3.13 安装更多工具
1 | # sudo yum list lrzsz unzip |
3.14 设置静态IP
1 | 查看网关IP: VMWare主菜单 / 编辑 / 虚拟网络编辑器, VMnet8 / NAT设置, 可以看到: |
修改文件 ifcfg-ens33 内容:1
2
3
4
5
6
7# BOOTPROTO=dhcp ## 替换为:
BOOTPROTO=static
IPADDR=192.168.126.101
NETMASK=255.255.255.0
GATEWAY=192.168.126.2
DNS1=114.114.114.114
DNS2=114.114.115.115
如果有专用网卡给虚拟机使用,可改 VMWare 为网络桥接模式,并在虚拟网络编辑器中把“VMnet0(桥接模式)”的“连接到”设置为专用网卡上。
3.15 安装桌面环境(可选)
1 | # https://cnzhx.net/blog/centos-yum-install-desktop/ |
如果遇到报错:1
2Error: Package: 2:postfix-2.10.1-6.el7.x86_64 (base)
Requires: libmysqlclient.so.18(libmysqlclient_18)(64bit)
则需要先手工安装 postfix:1
2
3
4# http://mirror.centos.org/centos/7/os/x86_64/Packages/
wget http://repo.mysql.com/yum/mysql-5.7-community/el/7/x86_64/mysql-community-libs-compat-5.7.17-1.el7.x86_64.rpm
wget http://mirror.centos.org/centos/7/os/x86_64/Packages/postfix-2.10.1-6.el7.x86_64.rpm
rpm -ivh mysql-community-libs-compat-5.7.17-1.el7.x86_64.rpm postfix-2.10.1-6.el7.x86_64.rpm
4. Ubuntu 安装
4.1 下载
http://www.ubuntu.org.cn/download/server
http://www.ubuntu.org.cn/download/alternative-downloads
http://releases.ubuntu.com/16.04/ubuntu-16.04-server-i386.iso.torrent
http://releases.ubuntu.com/16.04/ubuntu-16.04-server-amd64.iso.torrent
Ubuntu 16.04 Server (64-bit),Ubuntu 16.04 Server (32-bit),这里选用 64bit。
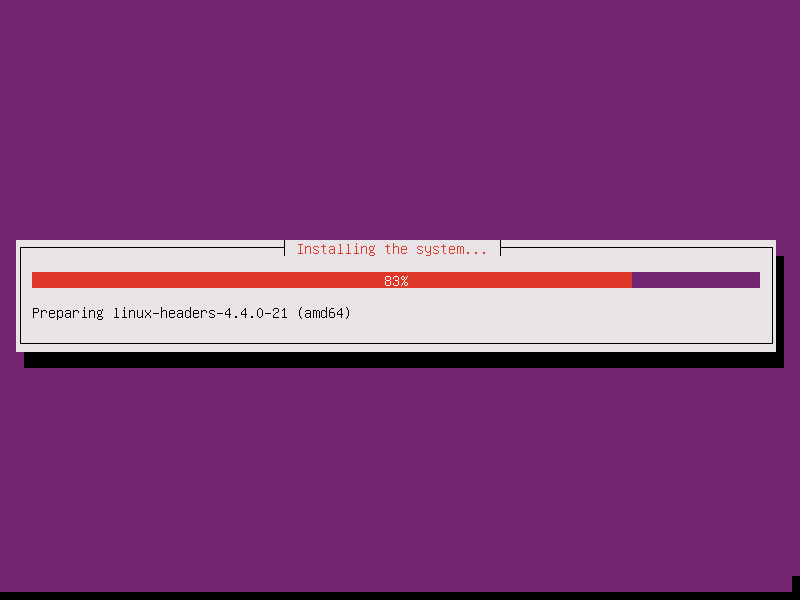
4.2 安装

VmWare中开始安装时指定预设用户 kefeng.wang 及其密码(admin 为系统预留不可用)
安装完毕后,以 kefeng.wang 登录,修改 root 密码:
sudo passwd root ## 输入一次 kefeng.wang 密码、两次 root 新密码
4.3 安装 openssh-server
1 | # sudo apt-get update |
SecureCRT 报错“Password authentication failed.”的解决办法:1
2
3## sudo vi /etc/ssh/sshd_config
PasswordAuthentication yes ## 去掉注释
PermitRootLogin yes ## 修改为 yes
1 | sudo systemctl enable ssh |
此后,可以使用客户端工具 SecureCRT 登录后再下面的操作。
4.4 SecureCRT 会话选项
- 仿真:终端=”ANSI”, “ANSI颜色”=on【重要】, “使用颜色方案”=on, 回滚缓冲区=32000
- 外观:当前颜色方案=”Windows”, 标准字体=”新宋体/Consolas 12pt”, 字符编码=”UTF-8”
- X/Y/Zmodem:上传、下载=”X:\Software\Download”
4.5 用户设置
1 | sudo userdel -r kefeng.wang ## 注意不是 deluser,同时删除用户目录 |
4.6 安装vim
1 | dpkg -l vim ## 尚未安装时,显示为 vim <none> |
vi ~/.vimrc1
2
3
4
5
6
7syntax on
colorscheme desert
set tabstop=4
set shiftwidth=4
set background=light
### set autoindent
### set cindent
4.7 修改时区、开启ntp
默认使用UTC时间格式,需要改为北京时间。1
2
3
4
5
6
7date -R ## 查看时区
sudo dpkg-reconfigure tzdata ## 依次选择 Asia/Shanghai
sudo apt-get --yes --fix-missing install ntp ## 失败要重试
sudo vi /etc/ntp.conf ## 尾部 server ntp.ubuntu.com
sudo /etc/init.d/ntp start
## sudo ntpdate time.windows.com
4.8 更多工具
1 | sudo apt-get install --yes unzip ## unzip |

